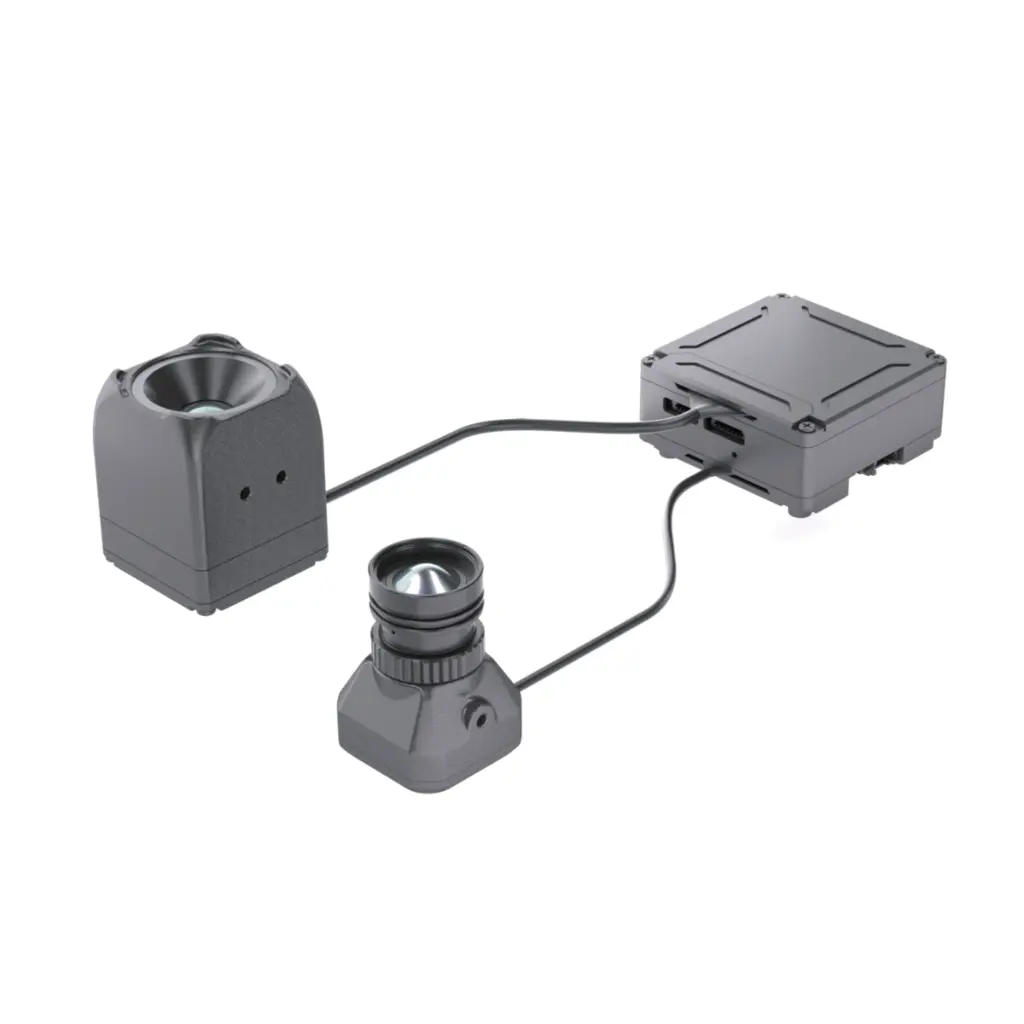
Caddx Eclipse 005SH Dual FT-D004A-V3 Thermovision Camera
The Caddx Eclipse 005SH Dual FT-D004A-V3 Thermovision Camera gives your drone two pairs of eyes. Thermal vision shows heat where an ordinary camera sees only darkness, and one flick of a switch on your radio brings back the normal daylight picture. Pixelpump-Gen3 makes heat sources stand out clearly, and you can watch the same picture on a second screen while you fly on your analog link.
Caddx Eclipse 005SH Dual FT-D004A-V3 Thermovision Camera — Thermal and Daylight View on One Switch
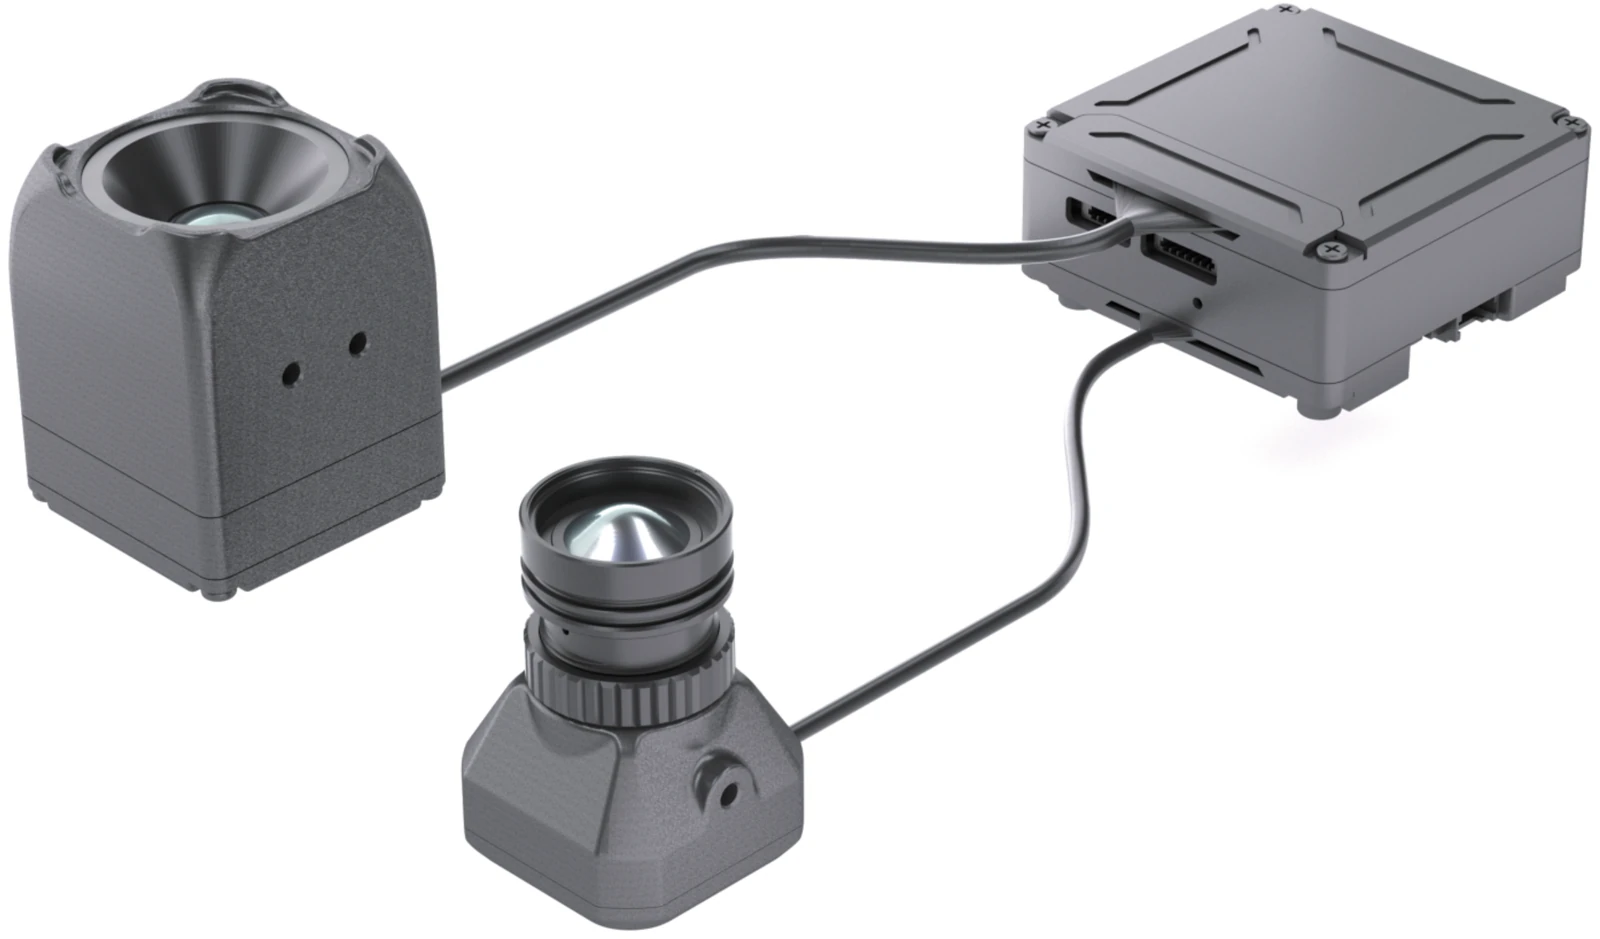
The Caddx Eclipse 005SH Dual FT-D004A-V3 Thermovision Camera is an analog FPV camera set made of three parts connected by cables: an Eclipse 005SH thermal camera (576x432 Pixelpump, 5.1mm F1.0 lens, 55° x 40° field of view, 19x19x26.26mm), a Ratel Ultra AI daylight camera (1/1.8" sensor, 6mm lens, 36.86° x 29.14°, 22x22x27.65mm) and an AI Box (33.5x33.5x16.5mm). You switch between the thermal and daylight view from your radio, through the flight controller. The AI Box outputs 50Hz video over analog PAL and digital UVC at the same time, runs on 6-20V, typically draws under 1.5W and works from -20°C to 50°C.
Clearer Thermal Image with Pixelpump-Gen3
The thermal camera uses third-generation Pixelpump-Gen3 technology, which makes the image clearer and heat sources more prominent. According to the manufacturer, Pixelpump-Gen3 also reduces slight blur caused by drone vibrations. Both pictures below were recorded on a Hawkeye analog receiver, the left one with a camera without Pixelpump-Gen3 and the right one with it.
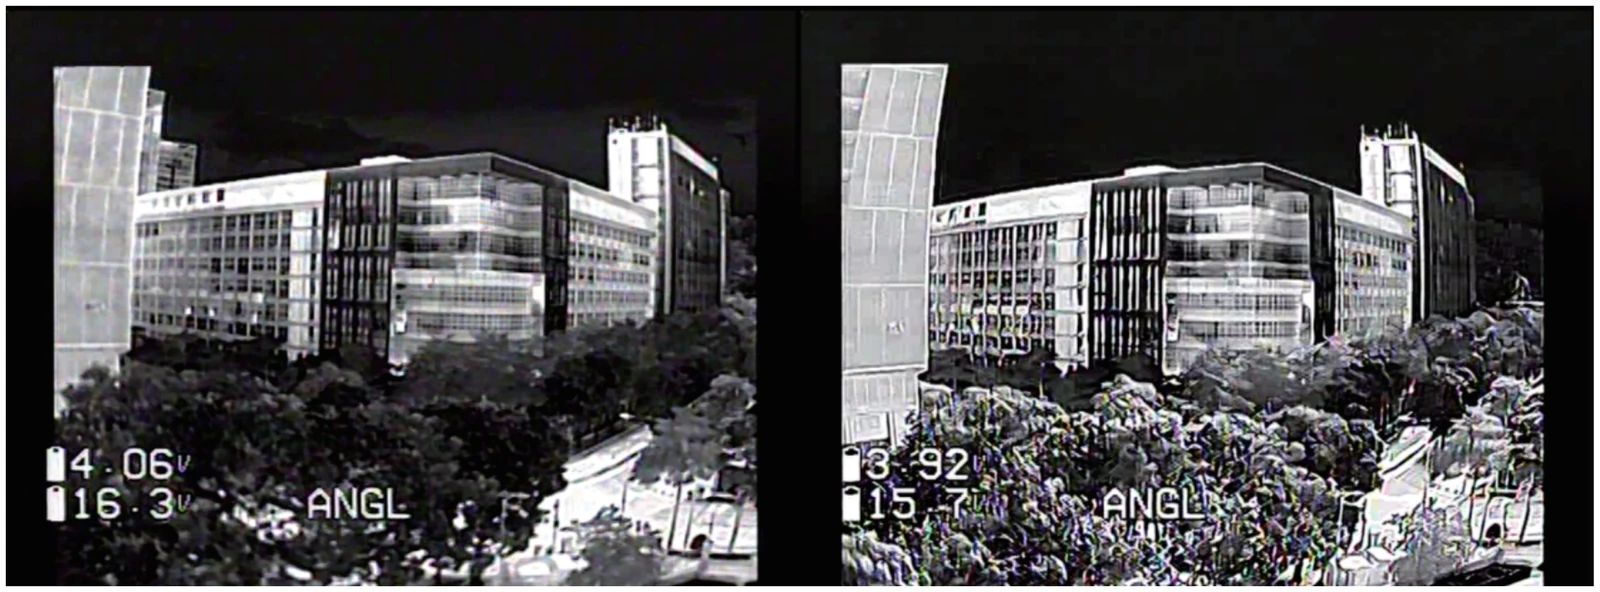
Without Pixelpump-Gen3
With Pixelpump-Gen3
Caddx Eclipse 005SH Dual FT-D004A-V3 Thermovision Camera Key Features
Two Cameras, One Switch
The set combines an Eclipse 005SH thermal camera with a Ratel Ultra AI daylight camera, and you switch between them from your radio. You use thermal vision where heat matters and the daylight camera where you need a normal picture.
Sharp Thermal Image
The thermal camera delivers a 576x432 image (Pixelpump-Gen3) at 50Hz. Heat sources stand out more clearly from the background, so objects are easier to spot in flight.
Analog and Digital at Once
The AI Box sends video over analog PAL and digital UVC at the same time. You can fly on an analog video transmitter and watch the same picture on a UVC device, such as a computer.
Wide Power Range
The set runs on 6-20V and typically draws under 1.5W. You can power it directly from a 2S-4S pack, and on 5S or 6S from a regulated output within this range, such as a BEC.
Caddx Eclipse 005SH Dual FT-D004A-V3 Thermovision Camera Interfaces
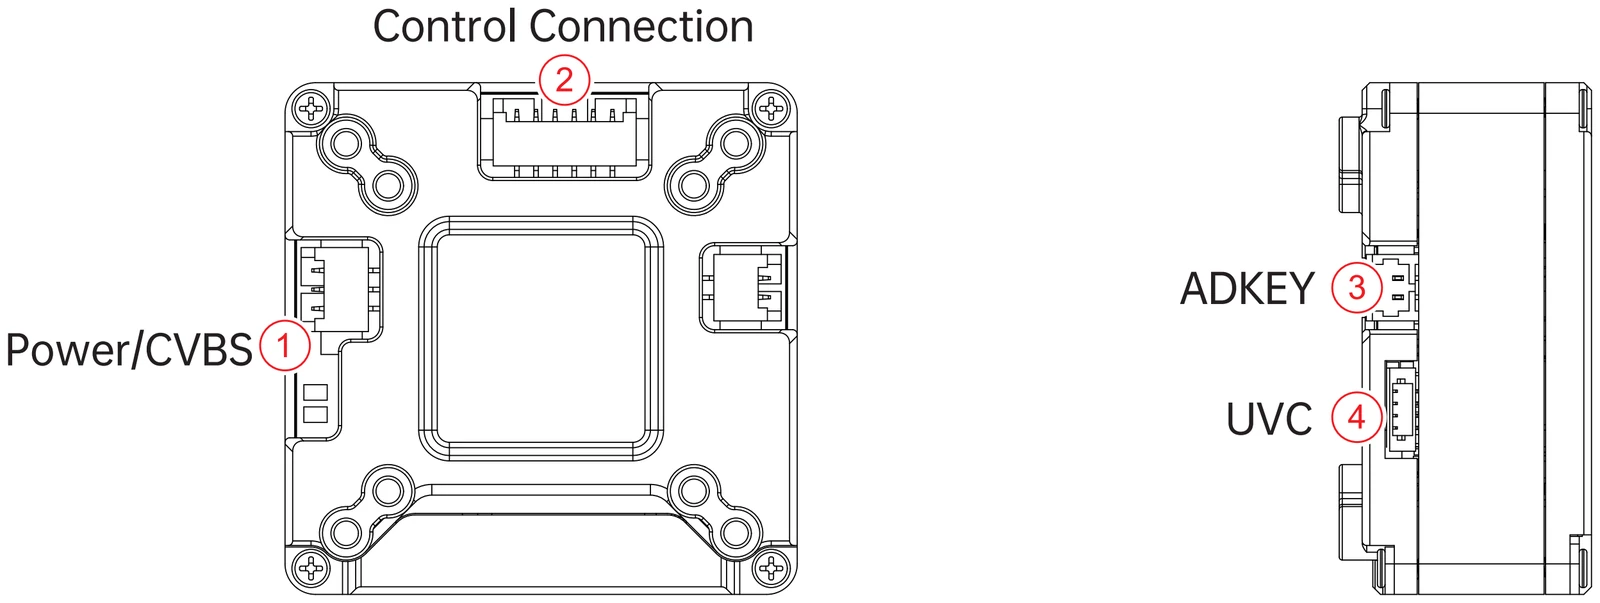
The connectors are on the AI Box, numbered as in the drawing below.
- Power/CVBS, power supply and analog video output
- Control Connection, control cable for camera switching
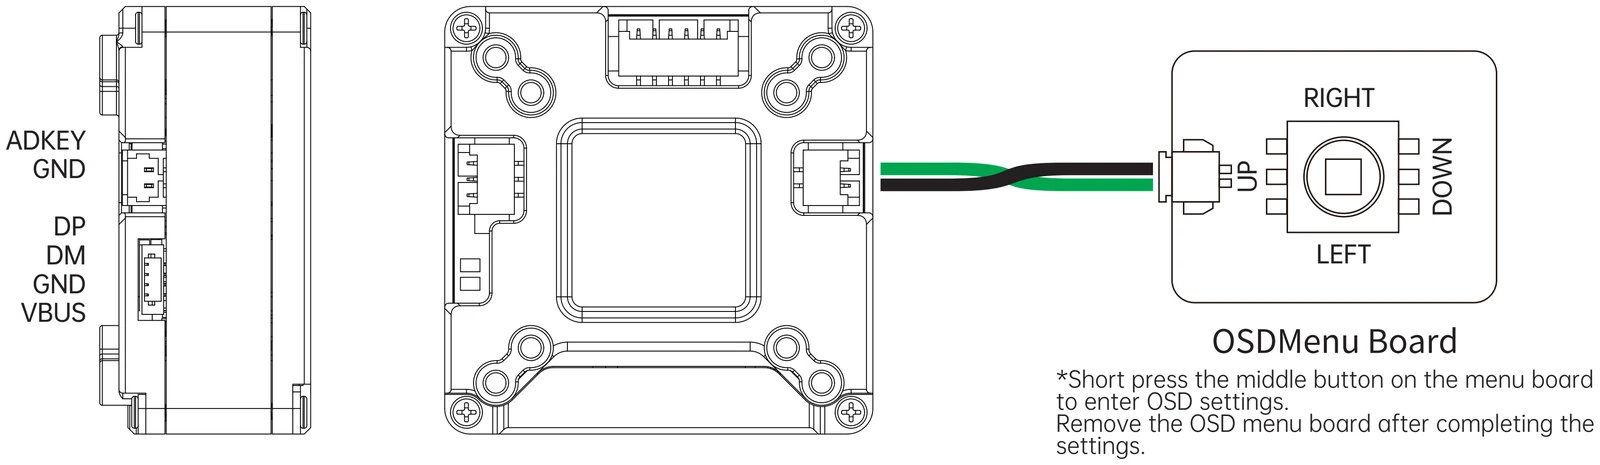
- ADKEY, connector for the OSD menu board (ADKEY, GND)
- UVC, digital video over USB (DP, DM, GND, VBUS)
With a UVC (USB Video Class) cable connected, the AI Box outputs MJPEG video. Brightness, contrast, color palette, image mirroring and zoom can be changed with standard UVC controls.
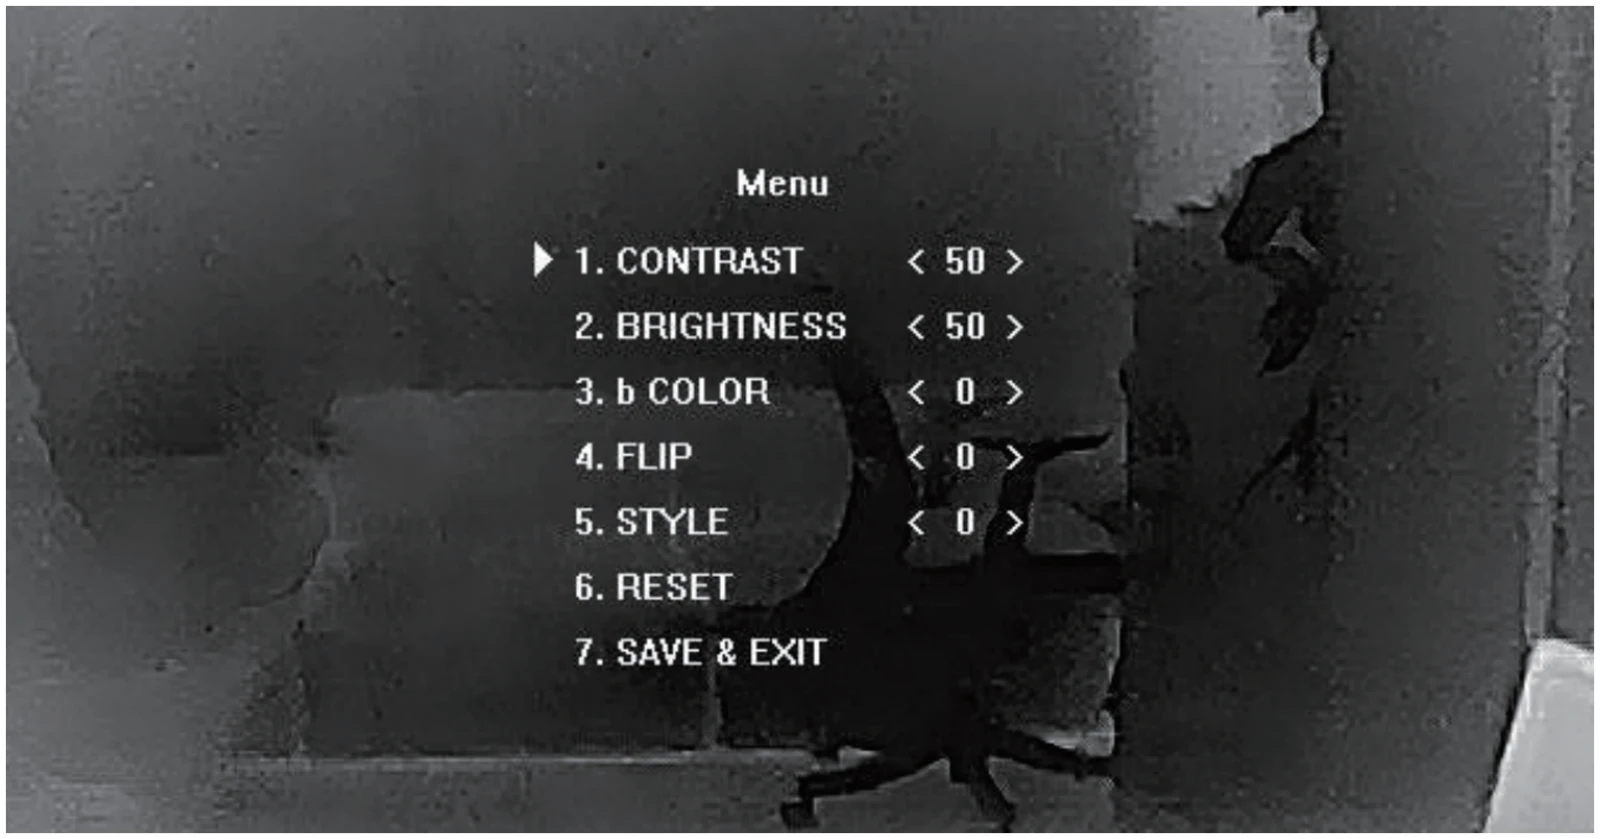
You can also change image settings with the OSD menu board. Connect it to the ADKEY connector and briefly press its middle button to open the OSD menu. The up and down buttons select a function, the left and right buttons change its value. You set contrast, brightness, color, image flip and style, reset the settings or save and exit. Remove the OSD menu board when you have finished the settings.
Caddx Eclipse 005SH Dual FT-D004A-V3 Thermovision Camera Thermal and Daylight Switching
You switch between the daylight camera and the thermal camera from your radio, through the flight controller. Connect the control cable to the Control Connection port and solder two of its wires to the flight controller, using a TX pad of a UART that is not in use.
- GPIO2 (green), to the TX pad of the flight controller
- GND (black), to GND of the flight controller
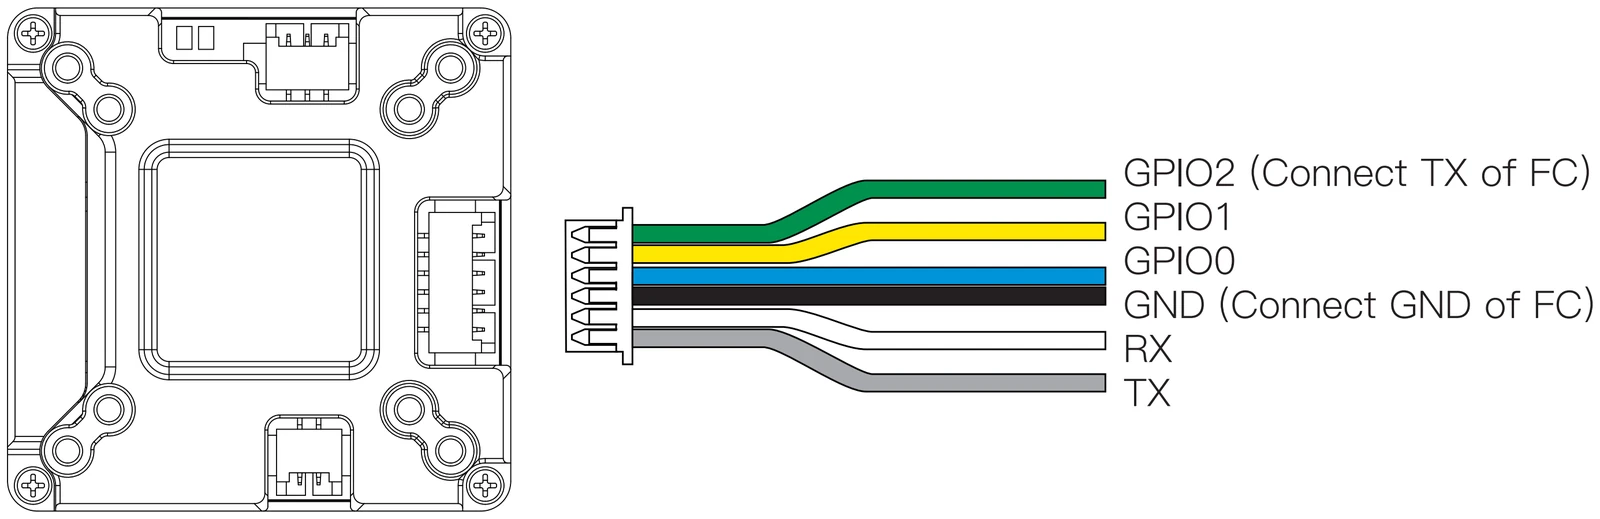
The example below is for a Betaflight F405 flight controller with the control wire on the TX1 pad, which is pin A09. Check the pin of your flight controller with the resource command in the Betaflight Configurator CLI and enter these commands.
| Disables the serial port function of the TX1 pin |
| Sets the TX1 pin as PINIO function 1 (A09 in this example, enter the pin of your flight controller) |
| Sets the PINIO function range |
| Saves the configuration |
Then, in Betaflight Configurator, assign PINIO function 1 (USER1) to an AUX channel of your radio. With the switch in the white part of the range you see the daylight camera, and in the yellow part the thermal camera.

Caddx Eclipse 005SH Dual FT-D004A-V3 Thermovision Camera Specification
Eclipse 005SH
Model | Eclipse 005SH |
Resolution | 576x432 (Pixelpump) |
Focal Length | 5.1mm |
Aperture | F1.0 |
Field of View | 55° (H) x 40° (V) |
Dimensions | 19x19x26.26mm |
Ratel Ultra AI
Model | Ratel Ultra AI |
Image Sensor | 1/1.8" |
Focal Length | 6mm |
Field of View | 36.86° (H) x 29.14° (V) |
Dimensions | 22x22x27.65mm |
AI Box
Model | AI Box |
Frame Rate | 50Hz |
Video Interface | 1x PAL + 1x UVC (simultaneous output) |
Supply Voltage | 6-20V |
Typical Power Consumption | <1.5W |
Operating Temperature | -20°C to 50°C |
Adjustment Method | UVC / ADKEY |
Brightness / Contrast | 0-100 |
Color Palette | 0-4 |
Digital Zoom | 1.0-4.0x stepless (controlled via UVC) |
Image Flip | Horizontal / Vertical / Diagonal |
Dimensions | 33.5x33.5x16.5mm |
Caddx Eclipse 005SH Dual FT-D004A-V3 Thermovision Camera Package Includes
- 1x Eclipse 005SH Thermal Camera
- 1x Ratel Ultra AI Daylight Camera
- 1x AI Box
- 1x OSD Menu Board
- 1x 2-Pin 1.25mm 10cm Silicone Cable
- 1x 3-Pin Silicone Cable
- 1x USB Cable